Office365 Scanning
Learn how to efficiently scan documents and images using Office365, improving your productivity and organization skills.

Written by Liam Downward
Updated at December 20th, 2024
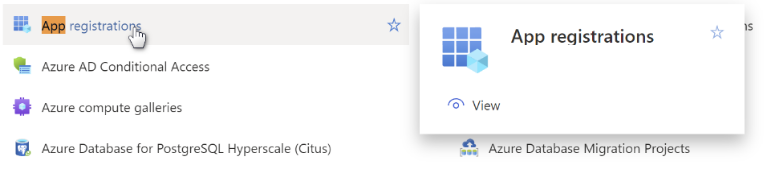
Navigate to Admin, click on Integrations the choose Office365 as your Credential Type:

Setting up and running a data scan in your Office 365 (O365) environment involves configuring integrations, assigning permissions, and provisioning a cloud agent. Follow the detailed guide below to ensure a seamless process.
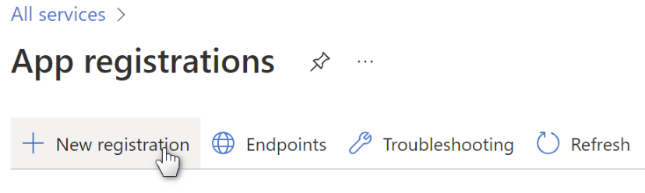
3. Click on “+ New registration”
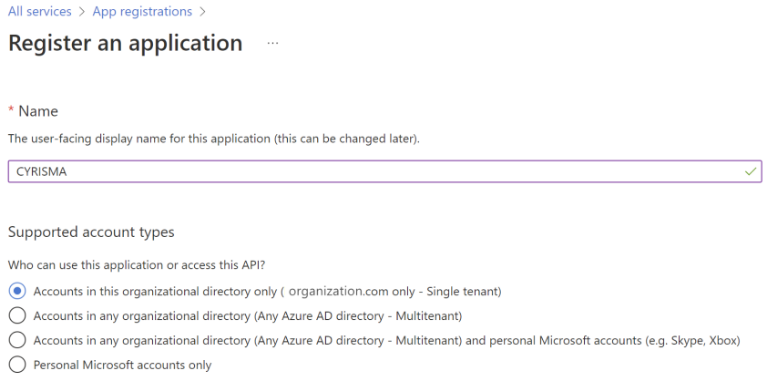
4. Name it: CYRISMA. Select: Accounts in this organizational directory only ([organization_Name].com only - Single tenant) as shown here and then click the “Register” button at the bottom of the page.
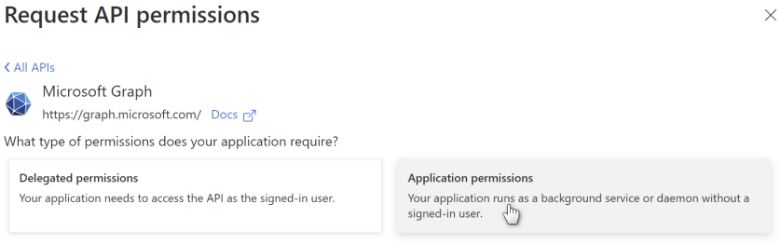
5. A registration object has been created, now assign it appropriate permissions.
On the left Azure menu, follow the link: API Permissions -> Add a Permission.
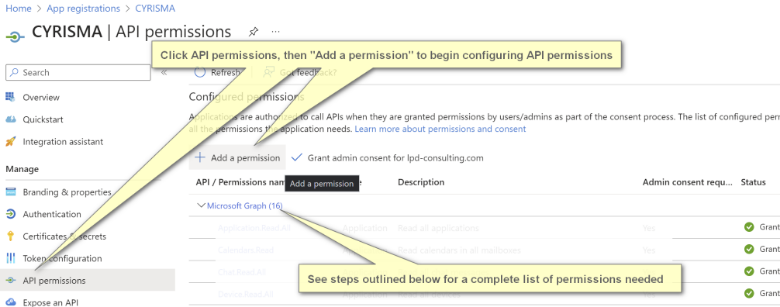
Select Microsoft Graph API.
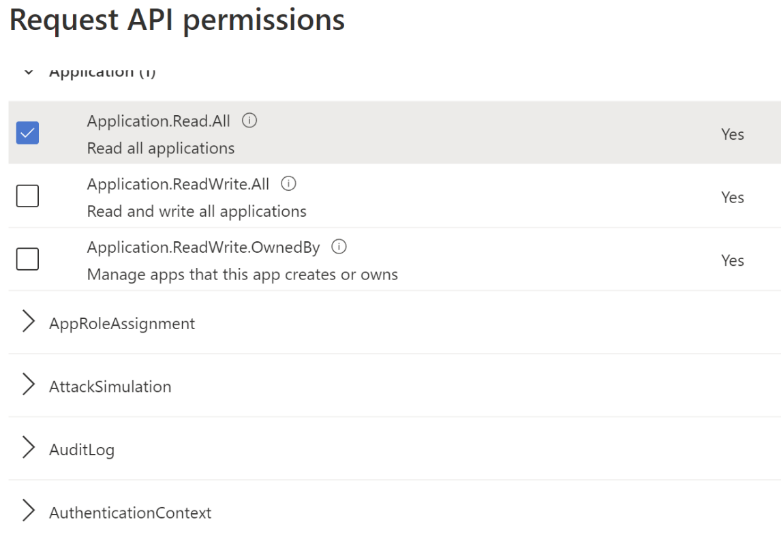
Navigate through permissions and select read only as needed, as shown here:
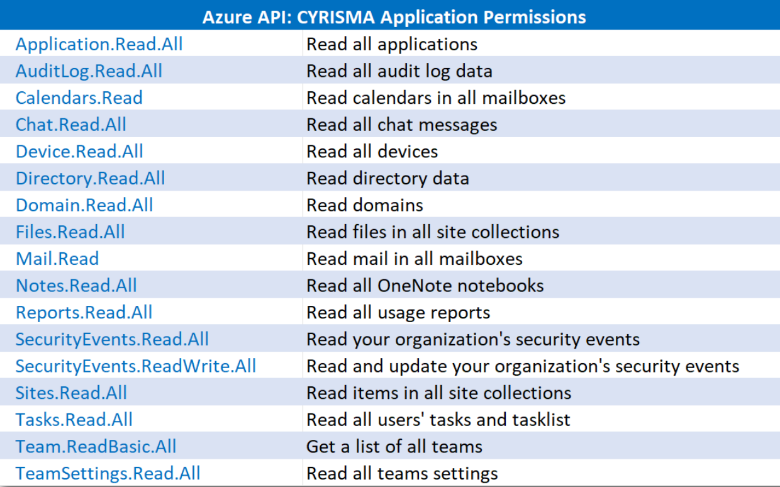
Continue through the API permission list and make sure the following have been selected:
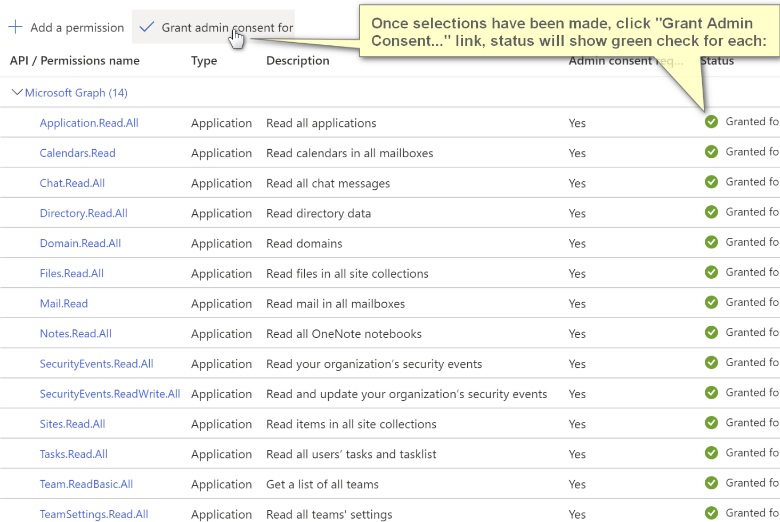
When all the permissions have been assigned, click on the Grant Admin link to accept all permission changes, and permission indicators will turn into green checkmarks:
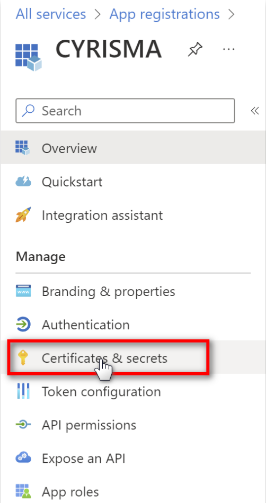
6. Generate a “Client Secret” which will be needed by the agent to authorize its access. Go to “Certificates and Secrets”:
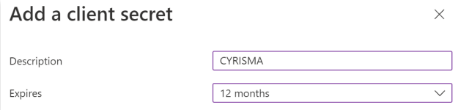
Follow the link to: “+ New client secret” and provide the Name “CYRISMA” with 12 months expiration as shown:
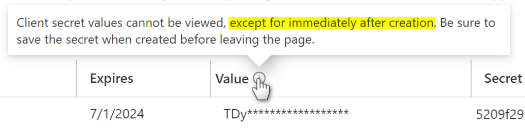
IMPORTANT NOTE: When a secret is generated, it is only shown ONE TIME at the time of generation. PLEASE RECORD this secret; it will be needed when provisioning the credentials for the cloud sensor. Do NOT copy the secret ID, but rather the secret VALUE.
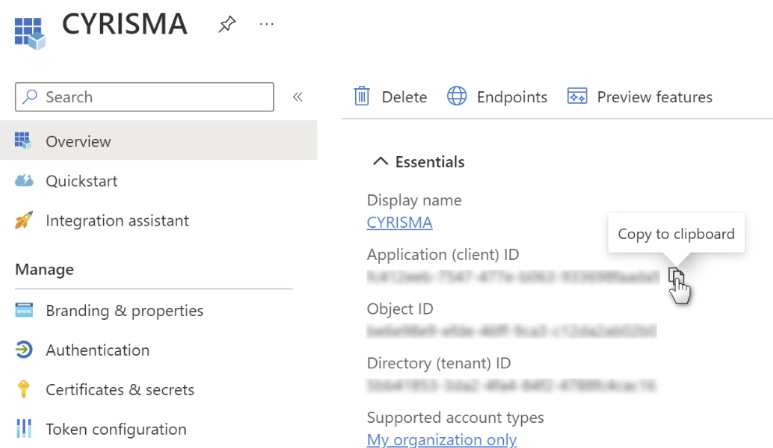
7. Along with the secret that was recorded above, also collect the Client ID and Netorg URL. Click Overview on the left menu and copy the Application (client) ID to clipboard, then paste and record this value for future use:
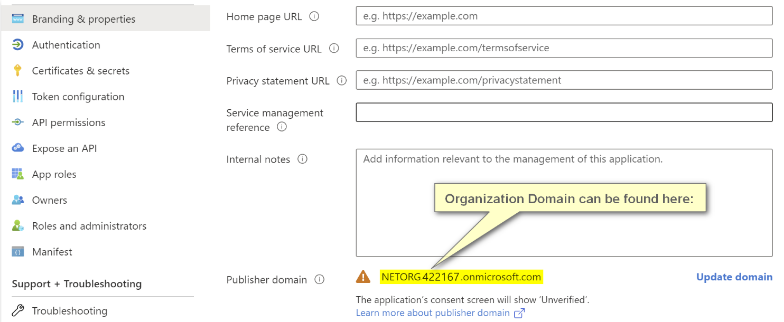
The Netorg URL can be found at the upper right of the Azure web page under the user name. A convenient copy of this can also be found by clicking “Branding & Properties” on the left menu:
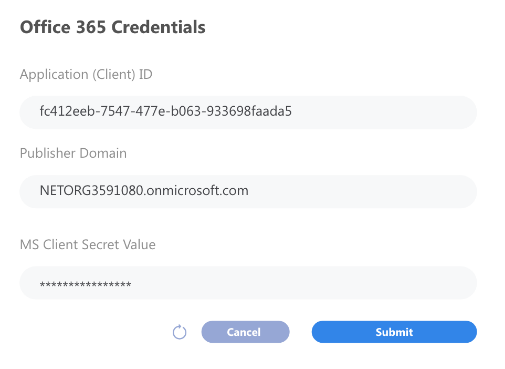
8. In the “3rd Party Credentials” pop-up, enter the collected MS Application (Client) ID, Publisher Doman (The Domain or Netorg value) and the Client Secret Value as shown:
Now that this is setup, you just need to provision your cloud agent, do so by going back to
Click the instance you want to add cloud agent for on left hand side, then hit the [Update] button

On this menu you will see a button to add a cloud agent to the instance.
